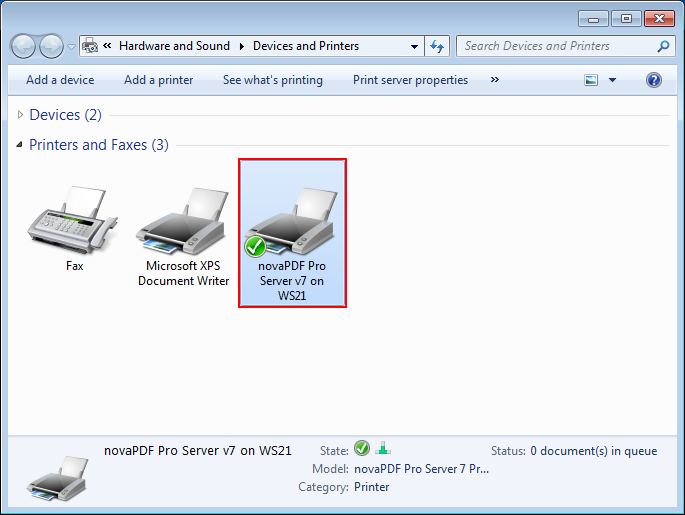
This tutorial shows how to share novaPDF in a network so that other client computers can connect to it and send documents for conversion to PDF.
On this page:
- Sharing the novaPDF printer on the server computer
- Adding the shared novaPDF as a PDF printer on the client computers
- Watch the following video tutorial on how to add a shared novaPDF on client computers
- Managing licenses for a shared novaPDF printer
novaPDF can be shared as a network PDF printer, can be installed on Terminal Servers and allows printing through Remote Desktop Connection.
If you don't have novaPDF installed, use the Download page to download and install it.
Once installed, novaPDF can be shared as a network PDF printer, installed on Terminal Servers or accessed via Remote Desktop Connection (starting with version 8 these features are available for all novaPDF editions - in v7 and previous only the Server editions had this functionality).
After novaPDF is installed on the PDF printer server, it needs to be shared as a network printer, so that on the client computers it can be added as a remote PDF printer.
Advantages of using novaPDF as a shared PDF printer:
- there is no need to install novaPDF individually on each client computer
- you can create profiles on the PDF server and those will be propagated to the client computers
- you can manage licenses directly from the PDF server
- in case novaPDF needs to be updated that will be done only on the PDF server where it's installed.
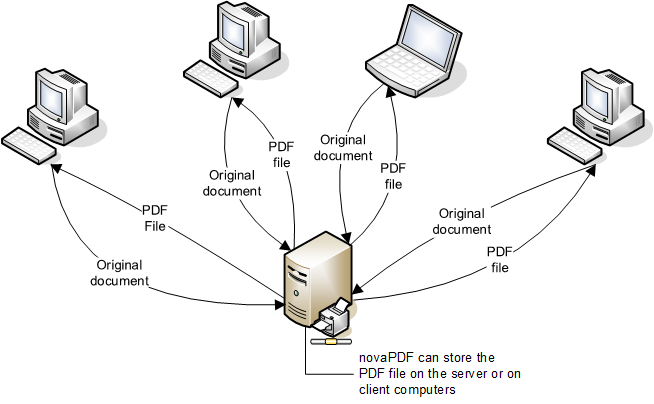
The diagram below shows the basic principle on how novaPDF works when installed on a PDF printer server:
Sharing the novaPDF printer on the server computer
novaPDF needs to be installed on the computer that will act as a network PDF server. Once installed it can be shared as a network PDF printer by following these steps:
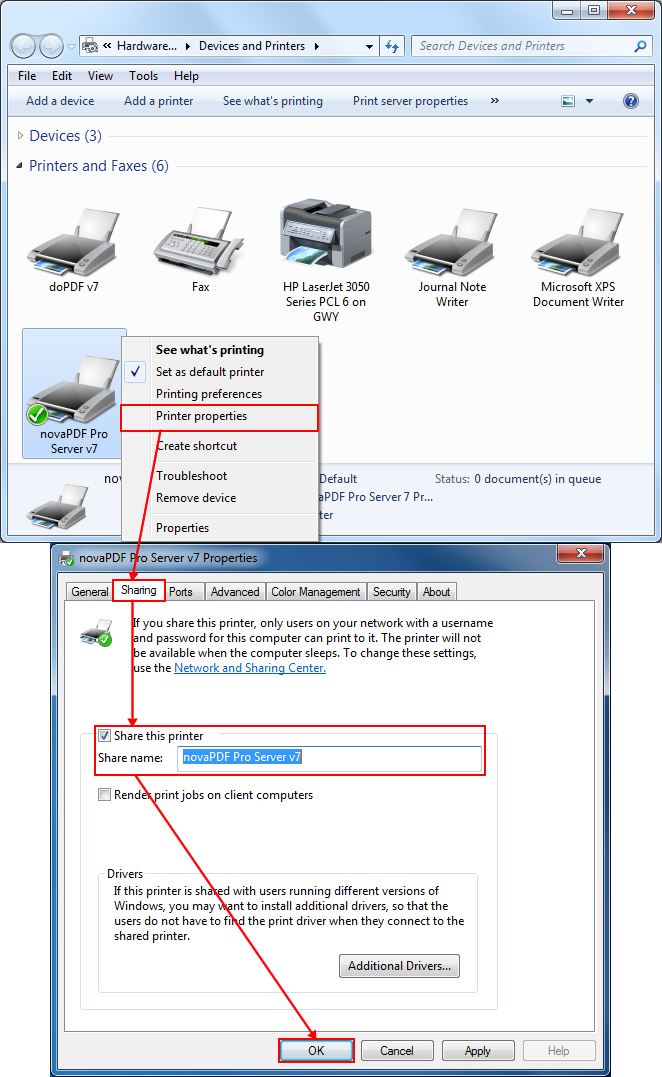
- Go to Start and type "printers" and then click on Devices and Printers in Windows 8 (or go to Start and click on Devices and Printers on Windows 7 and previous)
- Right-click on novaPDF printer and select Printer properties
- On the Sharing tab of the novaPDF Properties window, click on Share this printer and enter a Share name for it (this will not change the name of the local printer, will be used only for the network printer share). NOTE: If you are using Vista or Windows 7 make sure that the option Render print jobs on client computers is not checked.
- Click OK to save these settings. A sharing mark will be displayed in the lower left corner of the novaPDF printer icon. To be able to print to it from other client computers in the network it will need to be added as a network PDF printer on those computers.
Adding the shared novaPDF as a PDF printer on the client computers
After novaPDF printer was successfully installed on the server computer and shared as a network PDF printer (see first part of this tutorial), you'll need to add it as a remote printer on the client computers that will use it to create PDF files.
Here is an example on how to do that:
- On the client computer go to Start->Devices and Printers and click on Add a printer.
![share nova pdf 1 share nova pdf 1]()
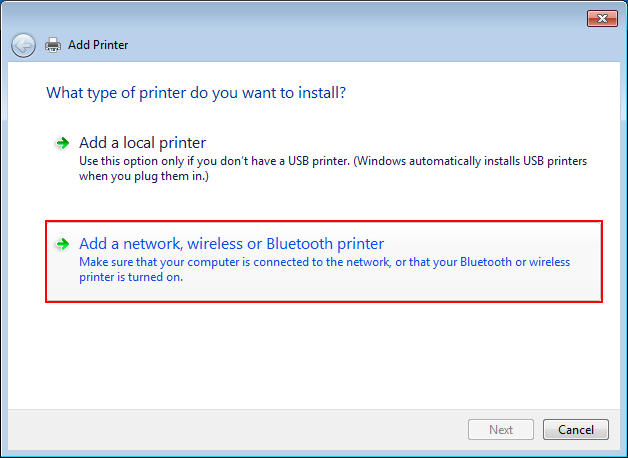
- On the Add Printer window select Add a network, wireless or Bluetooth printer.
![share nova pdf 2 share nova pdf 2]()
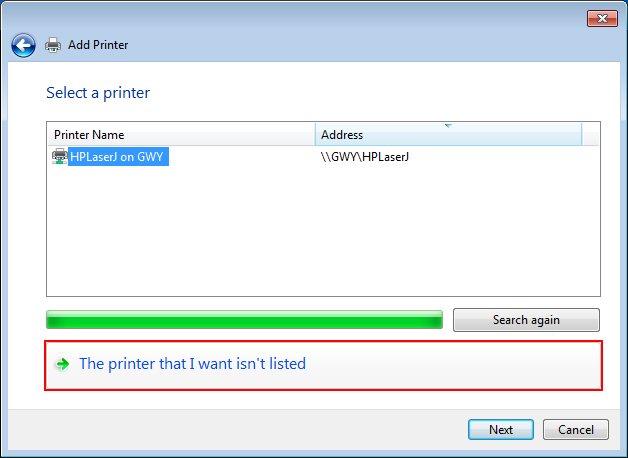
- The wizard will automatically search for any printers available on the network. If the printer is not listed after the search is over, select *"The printer that I want isn't listed"*.
![share nova pdf 3 share nova pdf 3]()
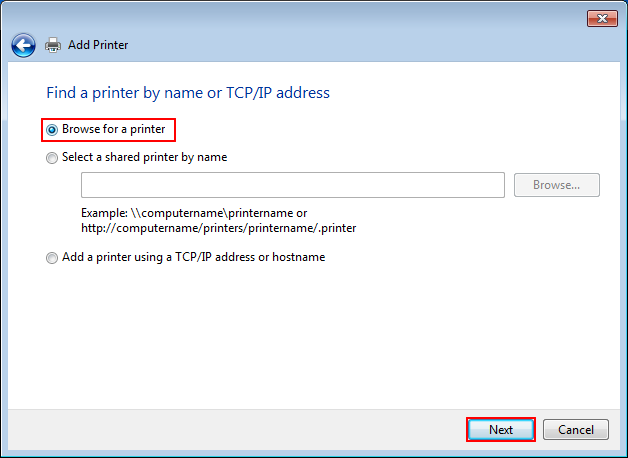
- In the "Find a printer by name or TCP/IP address" step, select Browse for a printer and click Next (if you know exactly the host name of the PDF printer server and the Share name you used for novaPDF, you can select Select a shared printer by name and enter the full path to it in the designated field).
![share nova pdf 4 share nova pdf 4]()
- Browse for the network PDF printer shared earlier on the Server computer and click on Select.
![share nova pdf 5 share nova pdf 5]()
- After you click on Select, the software drivers will be installed automatically (a warning window will pop-up, click *"Install driver"* to continue). After the process is complete you can create a test PDF file by clicking the "Print a test page" button.
![share nova pdf 6 7 8 flat share nova pdf 6 7 8 flat]()
- A novaPDF printer will be added to the list of available Printers and Faxes on the client computer and will be ready for use.
![share nova pdf 9 share nova pdf 9]()
- On the Add Printer window select Add a network, wireless or Bluetooth printer.
Watch the following video tutorial on how to add a shared novaPDF on client computers
Managing licenses for a shared novaPDF printer
License management for novaPDF can only be done on the server computer where it was installed and shared from. If a print job is started from a client computer in the network to the shared novaPDF printer, the client computer name will be automatically registered and a license assigned to it.
So as long as there are licenses available there is no need to use the license management feature. However, if you want to manually license, rename, delete or unlicense client computers you can do so by using the Licenses window:
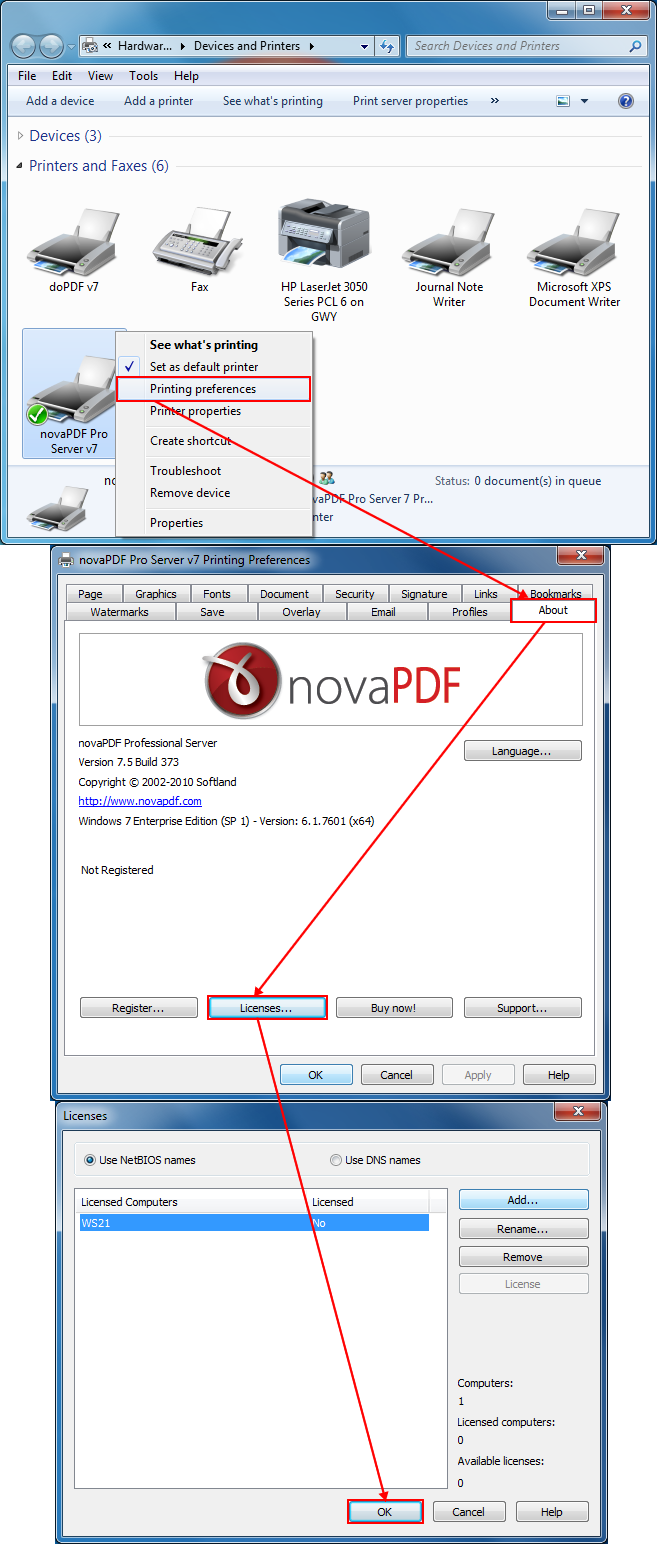
- On the server computer where novaPDF is installed and shared from, go to Start->Devices and Printers, right-click on novaPDF and select Printing Preferences.
- In the About tab click on the Licenses button to open the license management window.
- Use the Add, Rename, Remove or Unlicense buttons to manage the licenses. This window also displays a status of currently available/assigned licenses, as well as a list of the licensed/unlicensed computers (using their NetBIOS or DNS names, depending on your choice).
