When you try to create a PDF with novaPDF and choose to print the Entire Workbook from Microsoft Excel, each sheet will be saved as a different PDF file.
This happens because one (or multiple) sheets in your workbook have a different dpi setting for printing. Because of this, Excel assumes that each individual sheet has to be sent for printing separately, so it will send it in the same way to the PDF printer which will prompt to create a PDF from each sheet.
In order to have all the individual sheets printed within a single PDF file (not multiple PDFs) you need to set the same DPI printing value for all of them.
You can set the DPI value either for each individual sheet in your workbook, or for all sheets at once:
- The easiest method is to select all sheets and change their DPI printing settings. This works only if you have the same printing settings for each sheet in the workbook. Please note that by using this method you will have the same settings for all sheets, including the header/footer.
- However, if you have different printing settings for each page (for instance if you have a Header/Footer set for each page), you will need to change the DPI printing settings for each page individually.
To set the same DPI printing options for all Excel sheets in a workbook and print that workbook in a single PDF, follow these steps:
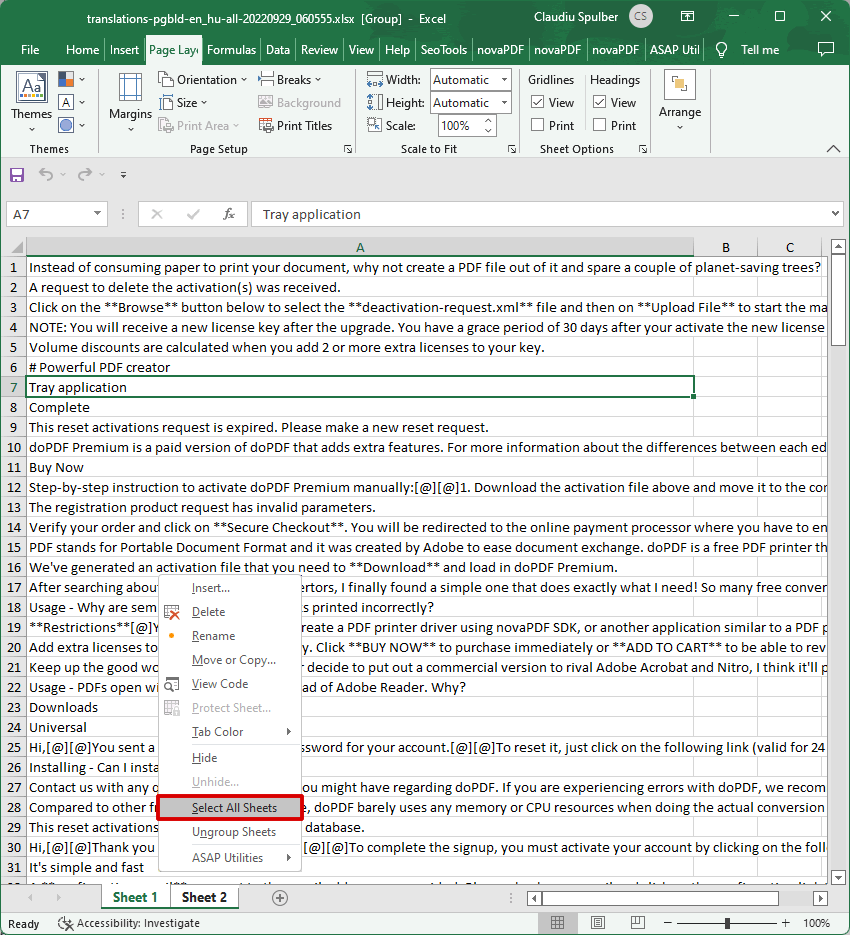
- Open the Excel workbook and right-click on the tab for any of the sheets you have in your workspace (by default they sheet tabs are named Sheet1, Sheet2, ...). Click on the Select all Sheets option.
![Select all sheets Select all sheets]()
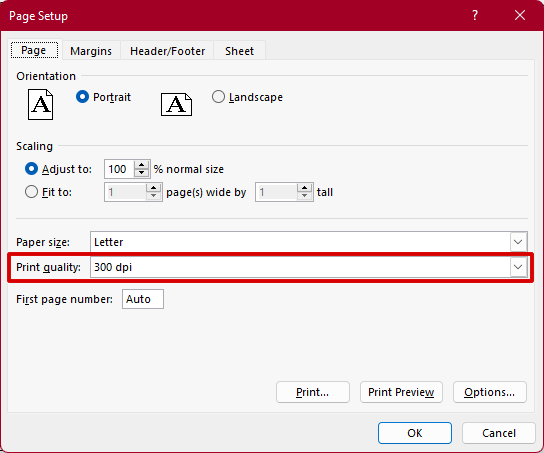
- In Microsoft Excel go to Page Layout and click on the expand button for the Page Setup dialog. Set the Print Quality to the DPI value you want and press OK so that Excel will record the fact that all pages have the same print settings. It's important to press the OK button even if you don't change anything, because this will "tell" Excel that all the sheets have the same page setup options.
![Print Quality Print Quality]()
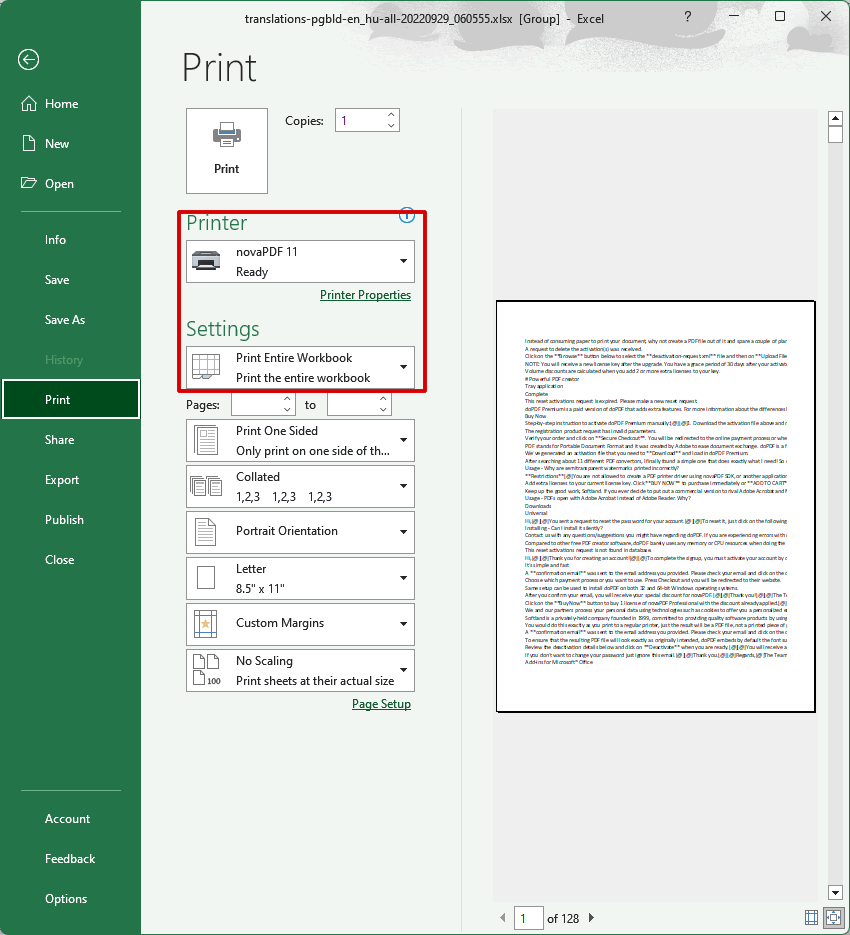
- Click on File then Print and see if you like the way the pages will show when printed to PDF. If you don't have any changes to the printing options select the Print Entire Workbook option under Settings and novaPDF from the Printer name section and click Print to create the PDF file.
![Print to PDF Print to PDF]()
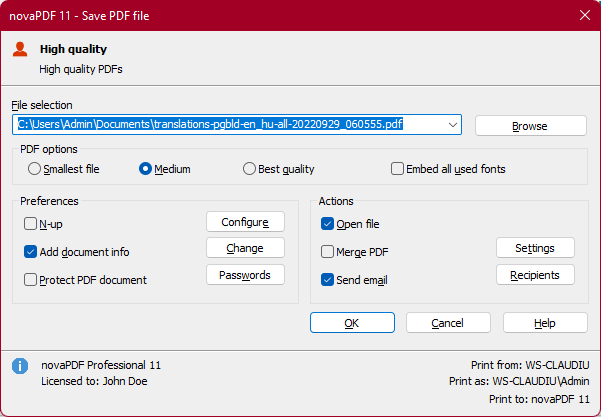
- The novaPDF Save PDF window will open. Choose where you want the PDF to be saved and click on OK to finalize the PDF creation. The PDF will be opened with the default PDF viewer.
![Save PDF Save PDF]()
novaPDF includes a PDF merging (combining) option, so another way to have multiple individual Excel sheets printed to a single PDF would be to use novaPDF's own merge option. This will let you print the first sheet to a PDF document and after that print all the other sheets in that workbook to the same pdf.
You can read more about the PDF merging option here: Merge PDF files with novaPDF


